Archive of ‘Recipe’ category

Vegan Chilli Sin Carne Recipe

Vegan Chill Recipe myfoxycorner

Vegan Chill Recipe myfoxycorner

Today I wanted to share with you one of my all-time favourite meals that just so happens to be vegan as well as full of nutrients and flavour. This Vegan Chilli Sin Carne (chilli without meat, but sounding way fancier) is one of the few dishes that Edd makes far superior to myself so I force him to make giant pots of the stuff that we can use all week for lunches, burritos, stuffed baked potatoes and more (I’m all for making one big meal that will go a long way).

Vegan Chilli Sin Carne Recipe

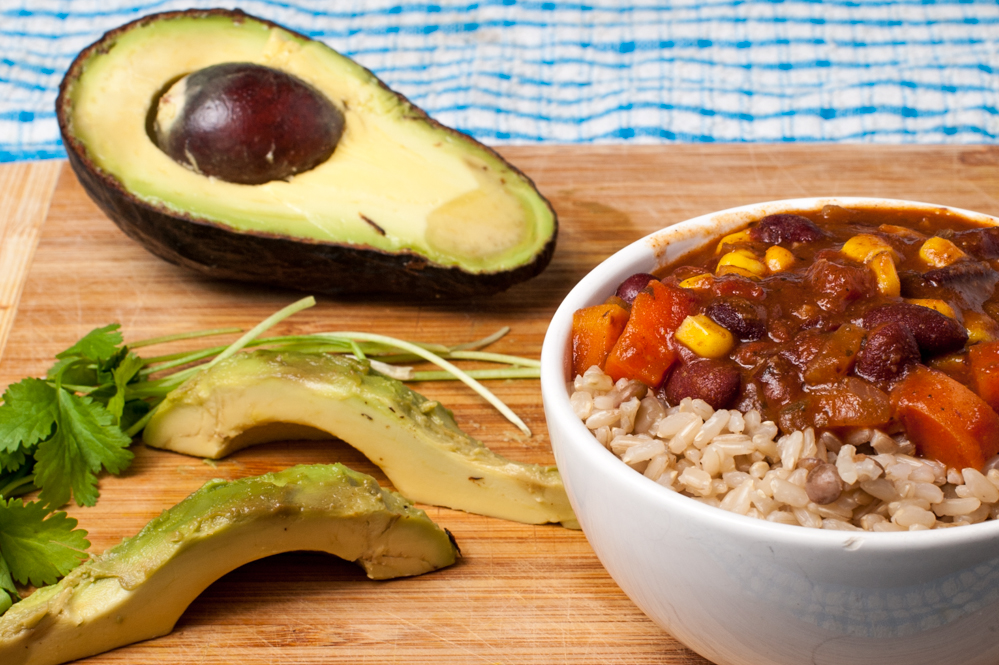
This chilli is just as flavoursome as the meat version, with a hint of smoked chipotle replacing the meaty flavour but keeping it rich and hearty. Packed with kidney beans, juicy corn and capsicums and the warm heat of chilli and bold, Mexican spices, this vegan chilli is perfection for winter where you want a bowl of filling soul food.

Ingredients Chilli Sin Carne Recipe Vegan Myfoxycorner

Vegan Chilli Sin Carne

Ingredients

  • 3 tsp cumin powder
  • 2 tsp paprika
  • 1/2 tsp cayenne pepper
  • dash of cinnamon powder (about 1/4 tsp)
  • 1 heaped tsp chopped garlic
  • 2 tsp chopped chilli
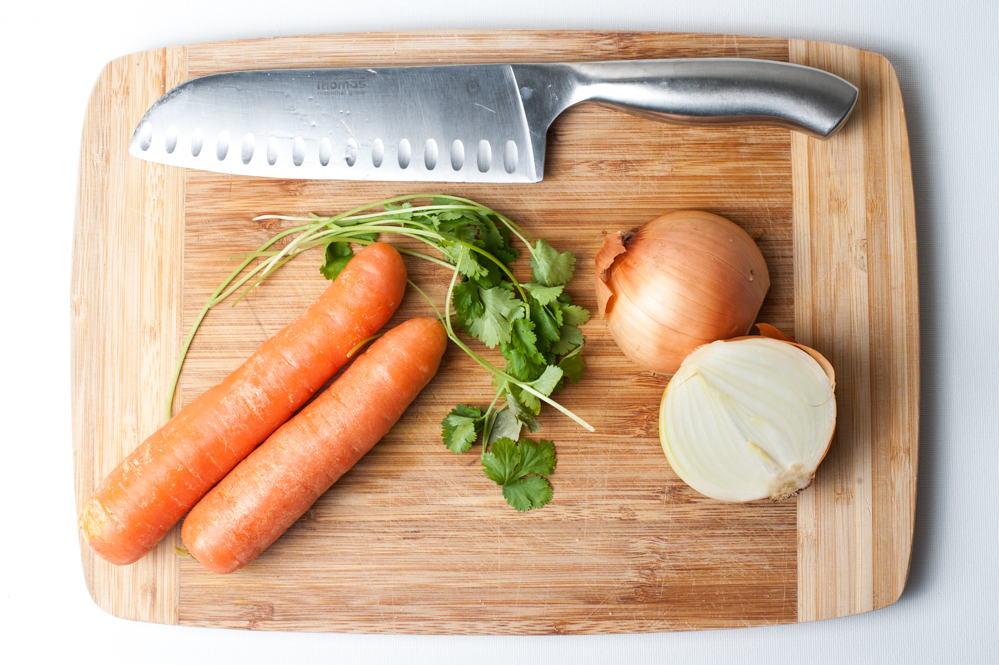
  • 1 brown onion diced
  • 1 Tbsp approx chipotle paste/sauce
  • 1 cup of veggie stock
  • 1 big carrot chopped
  • 1 red capsicum
  • 1/2 C sweetcorn
  • 1 can of kidney beans
  • 1 can chilli beans (e.g. Watties chilli beans which are basically kidney beans in a spicy tomato sauce)
  • 1 can chopped tomatoes
  • fresh coriander and avocado to serve
  • salt and pepper to taste
Vegan Chilli Sin Carne Recipe

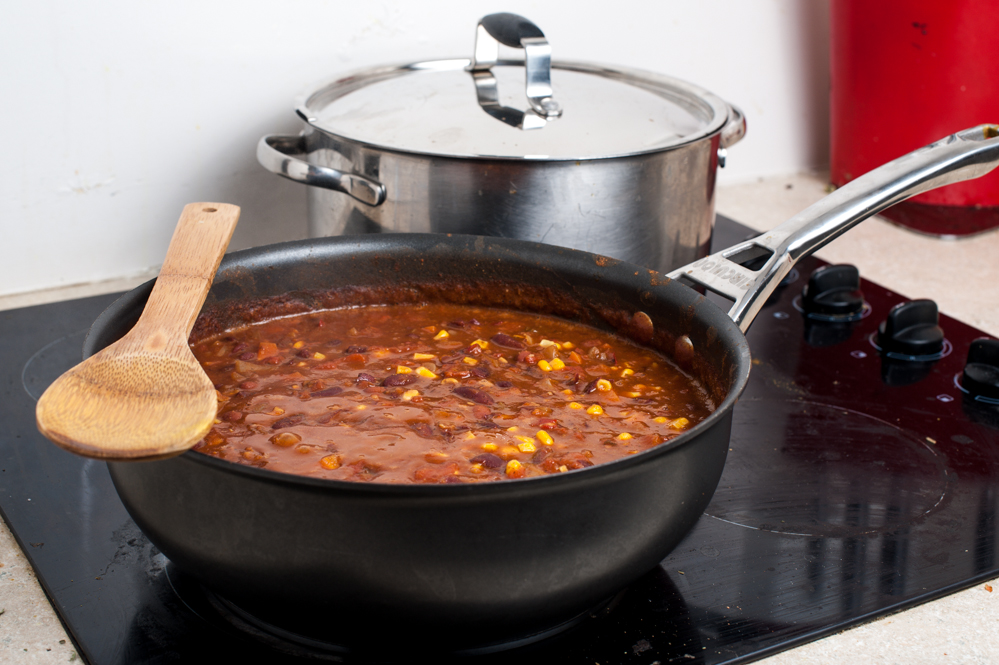
This is a giant pot with double the recipe stated here: enough to feed a small army, or two of us for a week.

Method: Vegan Chilli Sin Carne

  1. Fry off the onion, garlic and then the spices in a little oil until onion is soft and the aroma of spices fill the house. Add the chipotle and chilli and fry briefly.
  2. Drain your can of plain kidney beans and if you want to echo the texture of mince, mash these up with a fork until they look suitable (this isn’t required but does thicken up the chilli a little more).
  3. Chuck in your beans, chilli beans, carrots, tomatoes, vegetable stock and simmer for around 15-20 minutes (or longer if you have time and patience to let the flavours develop and the texture thicken).
  4. Make sure you taste at this stage in case you need to add a little more chipotle, a tbsp of brown sugar to sweeten it up, a bit more chilli etc. I tend to taste so much during the cooking process that by the times it’s finished I’m no longer hungry (doesn’t stop me eating :-/)
  5. Add your capsicum and corn and continue to simmer at a medium heat for another 10-15 minutes. Again, the longer you can leave this to develop, the better (it’s one of those dishes that is even more delicious the next day).
  6. Season with salt and pepper to your preference.
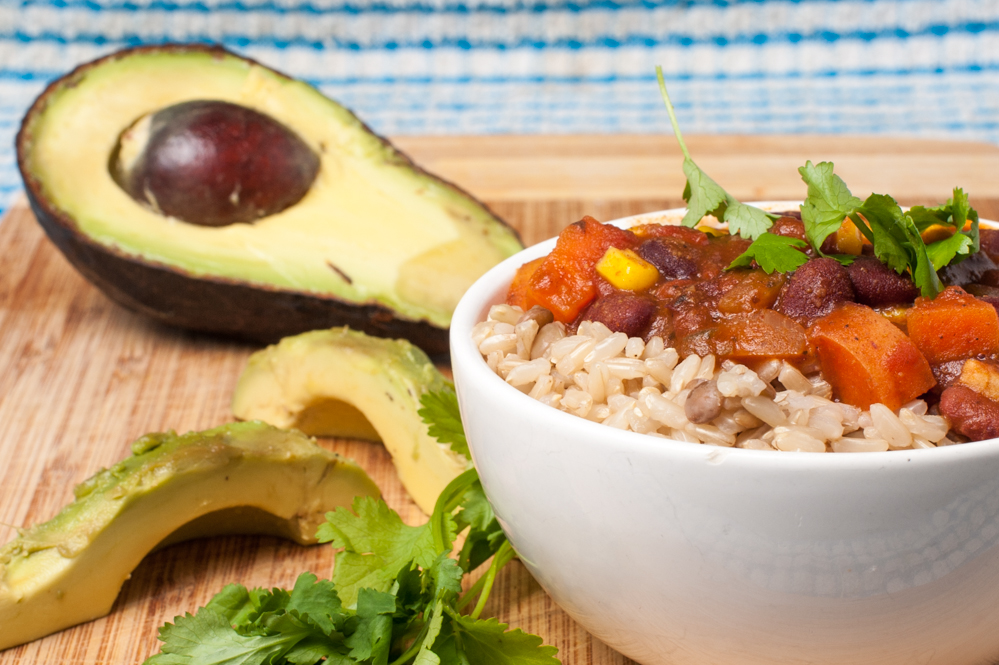
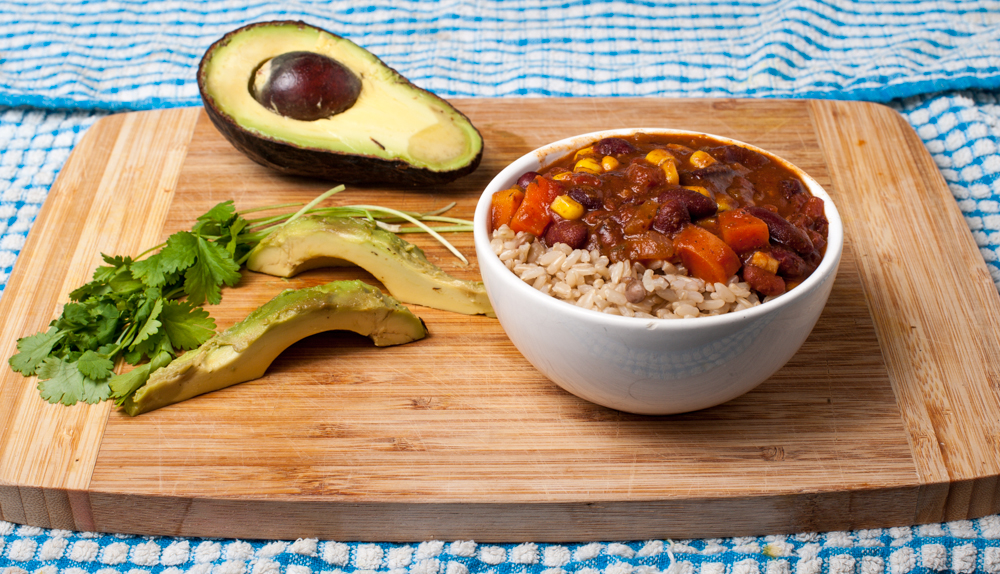
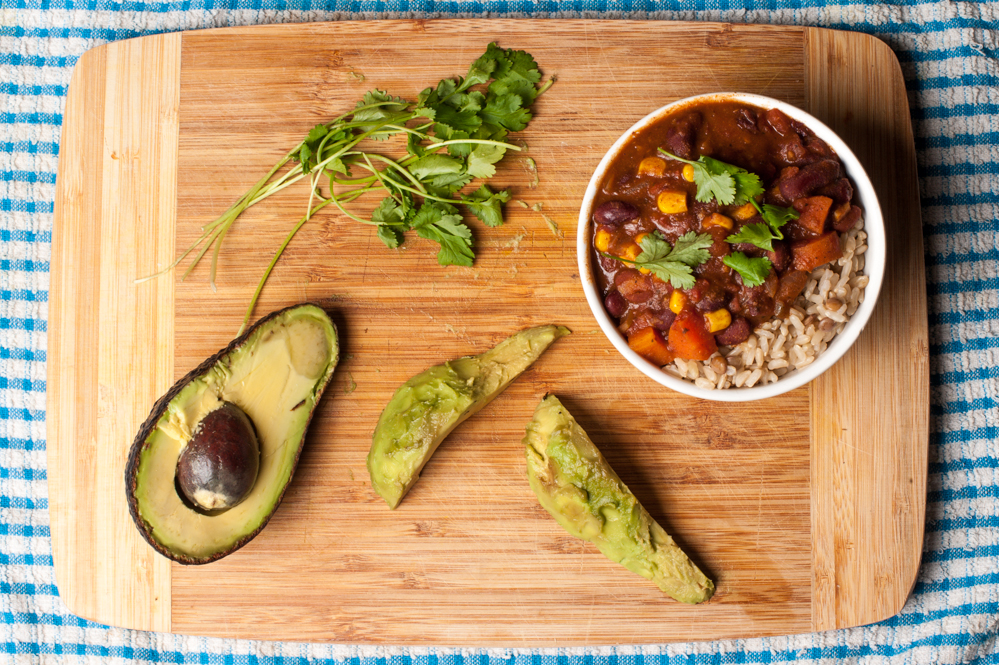
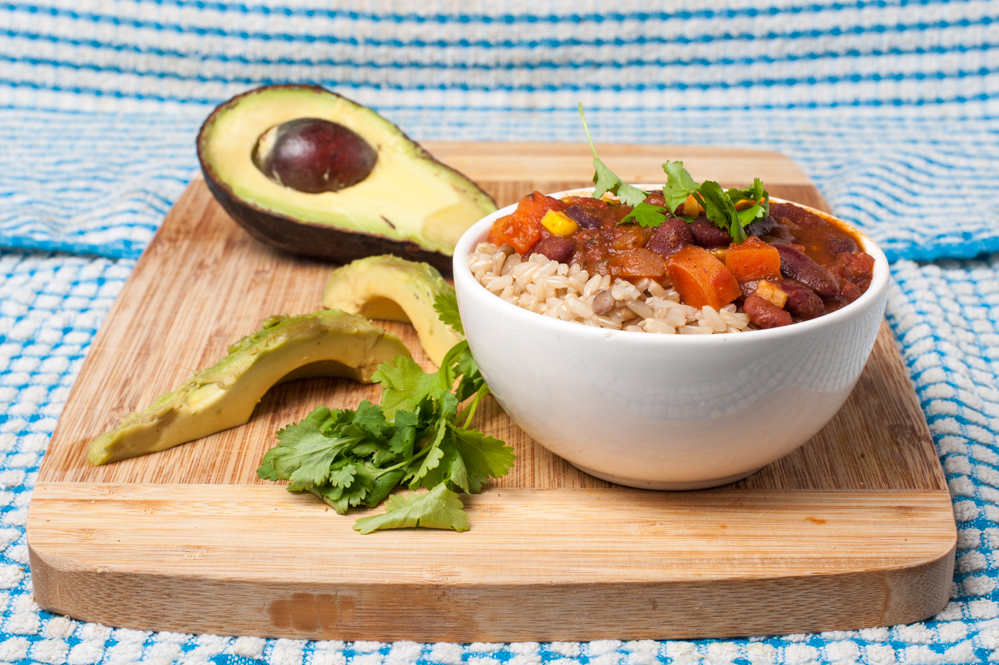
  7. Serve this along with some ripe avocado (ours was a little too ripe), freshly torn coriander and enjoy over a bowl of rice, a baked potato, or thrown inside a burrito with some salad! You can top with sour cream and cheese for something a wee bit more indulgent (but no longer vegan), but I promise it’s just as mouth-wateringly tasty without it. We have been enjoying this with a brown rice and lentil combo, usually making a double batch so that we can keep some in the freezer.

Chilli Sin Carne Vegan Recipe

This might seem life there are a few steps but it’s actually a straightforward and easy recipe that just involves a little more patience than my usual 5 minute meals, I promise its all worth it.

The beauty of this dish is that its so flexible to your tastes (and what’s lurking in the cupboard waiting to be used). We’ve tried adding brown lentils to bulk it up and include extra protein and this works well however I recommend cooking the lentils separately before hand. We’ve played around with the spices, the types of beans, the veggies we chuck in and it all comes out pretty darn delicious.

Vegan Chilli Sin Carne Recipe

I used to eat chilli con carne all the time before becoming vegetarian, so nothing makes me happier than knowing that this delicious spicy stew is even better packed with beans and veggies (and its also an abundant source of protein, as well as a meal that includes all of essential amino acids). Pairing the rich dish with fresh avocado and coriander brings the whole thing to life so I definitely suggest including those (preferably when avocados don’t cost the same as a Starbucks coffee).

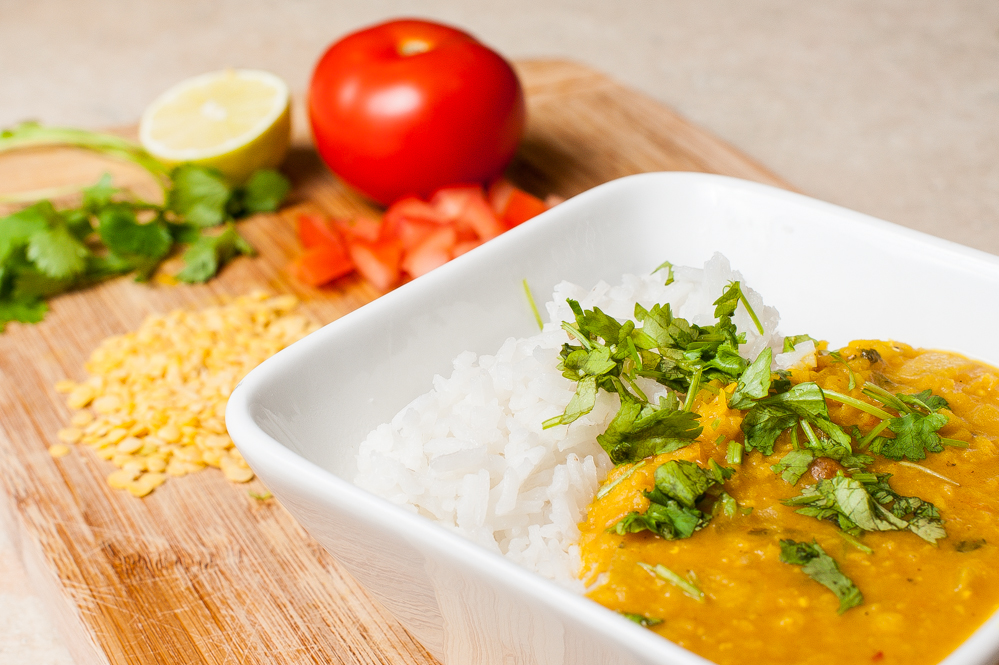
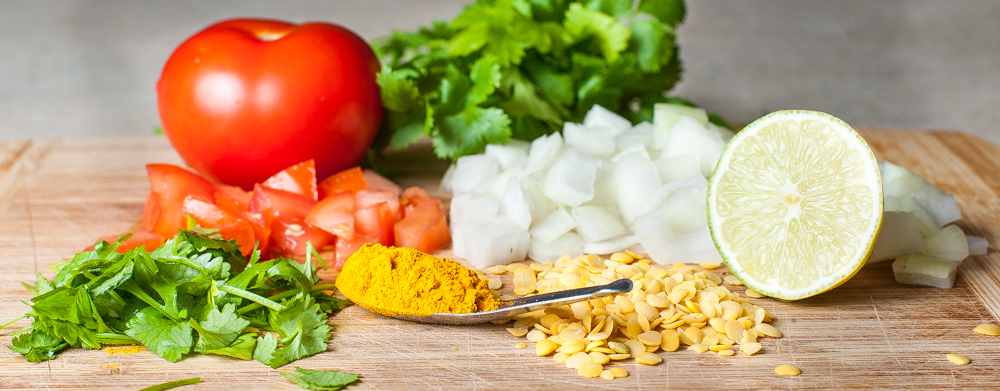
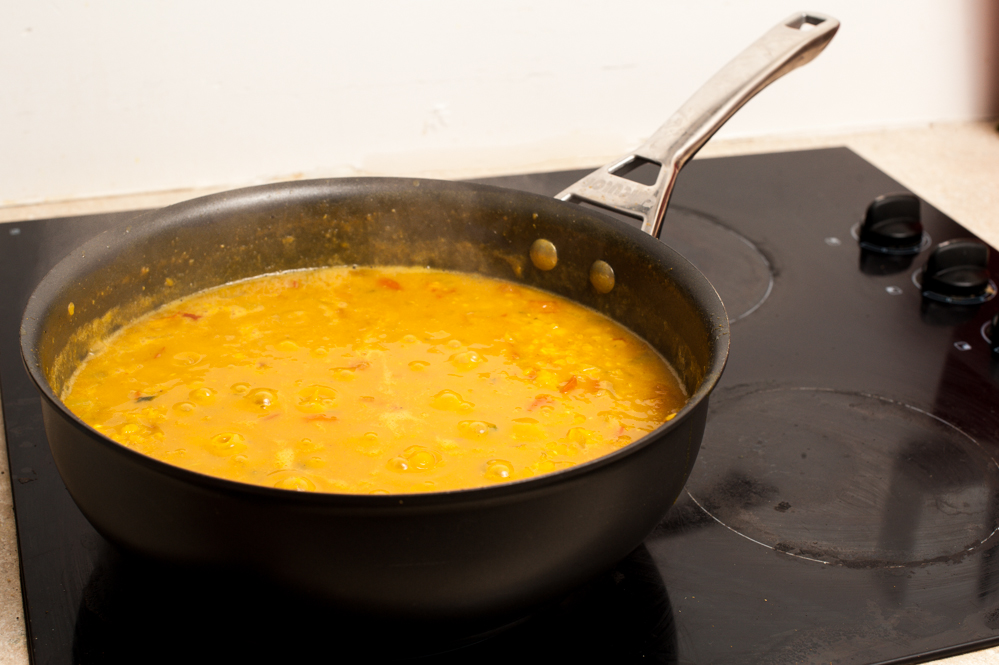
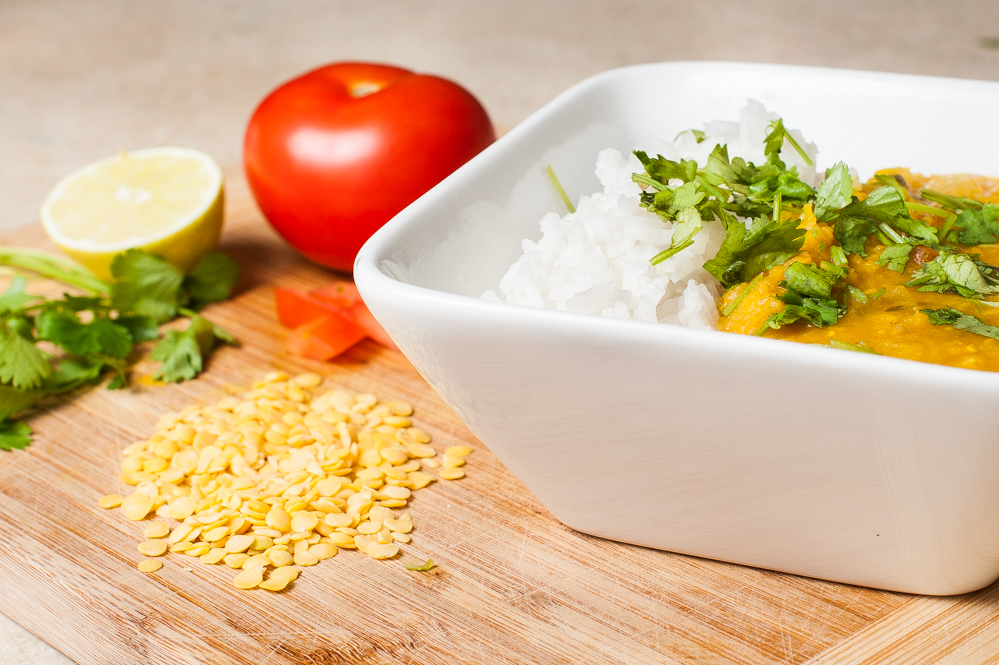
If I had to choose a favourite winter meal it would either be this vegan chilli or my easy Indian Dahl. Give this one a go and let me know what you think! Is there anything different that you like to add to your chilli?

Chilli Sin Carne Vegan Recipe  Myfoxycorner


A big thanks to Edd who cooks this vegan chilli for me way more than he should have to, and who also took these beautiful photos whilst I was out spending money on brunch.

Have an awesome week guys!

xxx

Tropical Gogi Smoothie

Coconut Tropical Smoothie

I hope every one has had a beautiful weekend, mine was pretty amazing. Yesterday, Edd and I made the brave decision to leave the warmth of our bed and go for a bushwalk out in the Waitakeres. There’s something a little spectacular about walking across the top of a dam, surrounded by bush.

Looking out across the dam and pondering whether my phone camera can handle how spectacular it is.

Looking out across the dam and pondering whether my phone camera can handle how spectacular it is.

Today is part two of the smoothie posts, and this one is a little more creative then the last (both are equally as delicious and satisfying however). This tropical gogi smoothie features a whole bunch of delicious stuff; pineapple, limes, banana, gogi berries, coconut water and some almond/coconut milk.

Together this combination is sweet and sour from the pineapple and lime, creamy from the bananas and refreshing with the coconut flavours. The gogi berries are added because I haven’t played around with them, and they added a delicious tartness. Tropical goodness, because winter is the perfect time to pretend your chilling in a pacific paradise, right?

Bonus points to this for being healthy and vegan as well as straight up delicious.

Tropical Gogi Smoothie

Tropical Gogi Smoothie

Ingredients

  • Approx 1 C of chopped fresh/tinned pineapple
  • Juice of 1 lime
  • 1 banana
  • small handful of dried gogi berries
  • 1 C of unsweetened almond/coconut milk or alternative
  • 1/2 C coconut water
  • Ice if desired (if not, make sure the liquids are kept in the fridge beforehand)

Method – Again, not much of a method, more of a chuck it all in and blend until smooth. This will serve two people. The gogi berries do add a bit of texture, so if you don’t like the “bittiness” of them, feel free to soak the berries for approx 2 hours in a little hot water before blending.

This is my favourite smoothie to make when we have a bit of extra time or want something with more of a flavour punch. It’s like the deliciousness of a pina colada but appropriate to be drinking at 8am. The best thing about this is that you can leave out/change up the ingredients to suit your tastes, I love the zing of the lime but you could cut down if you prefer (although if you don’t love limes and add them to everything I don’t know if we can be friends).Tropical Gogi Smoothie

The coconut water may not be the miracle drink it’s hyped up to be, but it does include a bunch of electrolytes and nutrients with a low calorie impact. Gogi berries are a bit of a popular nutrient gold-mine but like any fruit should be eaten in moderation.The almond and coconut milk is incredibly tasty and is my current non-dairy favourite, with a delicious nutty flavour and not too much sweetness.

This is as close to Tank smoothies as I get without leaving the house, and it makes me wish I had a pineapple tree as well as a constant supply of limes. Also, it’s not green, and we all know how much I love smoothies that aren’t packed with sneaky spinach (one day I will come up with a successful recipe, until then the leaves will stay in the salads).

Do you have any smoothie suggestions for me to try out? 

Dahl – Easy and Delicious, Vegan Winter Recipe

Easy Dahl Recipe

untitled-13

Dahl (or more specifically, Tarka Dahl) is just one of those dishes that changes slightly every time I make it. Sometimes its the spices that get chucked in, sometimes is the amount of water; I’m just not a very consistent or specific cook. This probably means I should steer away from posting recipes on myfoxycorner, but I have been wanting to share more of the vegetarian meals that we love, which tick the boxes health-wise but are also delicious enough to keep a meat-eater satisfied (at least for a night).

untitled-22

You know those meals that bring back vivid memories? Dahl will always take me back to my childhood, it was one of the few recipes my mum would make (after a stint in Fiji where she became pretty handy with the spices) and something that we could eat for days on end when there was no money for meat or fresh produce. Its a nourishing meal, in every sense of the word. This is the grown up version of budget eating for the poor adult student, or perfect winter meal for the hungry vegetarian, or the saviour for the exhausted mum with 4 kids with big appetites, or the perfect adventure for a meat free Monday. Its pretty great.

Dahl is wonderfully warming and ideal for these colder months. The subtle spices and rich lentils create a true comfort food, and its also easy, cheap and perfect as leftovers. This is definitely one vegan meal that ticks all the boxes. Okay, so my recipe probably (definitely) isn’t 100% authentic, but it’s a one pot wonder that is so low-fuss and delicious, I don’t even care).

untitled-11-3

Easy Almost-Indian Dahl (serves approx. 4 hungry flatmates).

Ingredients

  • 2 Cups of yellow (or red) lentils
  • 1x brown onion chopped finely
  • 2 tsp garlic
  • 2 tsp ginger
  • 1-2 tsp red chilli
  • 2 tomatoes, diced
  • 1L vegetable Stock or boiling water
  • 1 Tbsp turmeric
  • 1 tsp cumin
  • 1 tsp ground coriander
  • Fresh coriander
  • 1 lemon/lime

untitled-14-2

Method

  1. Heat some oil in your pan/pot and fry off the onion until it softens on a high heat. Add in the garlic, ginger and spices and continue to fry for around a minute or 2, this releases the flavour of all the spices and is probably the most important step of any good curry.
  2. Lower the heat and add the lentils and the stock, along with the chilli, and leave until the lentils are completely cooked (approximately 20-30 minutes). You need to keep an eye on this and give it a stir every now and again, so don’t get distracted. It may look like a soupy mess, but the lentils are going to expand and soak up all that spicy stock, don’t even worry about it. Once the lentils are cooked, you can add a bit more water if you prefer your dahl a bit soupier, or leave it thickened. This is totally up to personal preference, I tend to like something in between a soup and a curry and add water as I go to get the perfect consistency.
  3. Add the tomatoes towards the end to prevent them completely disintegrating (like they did for me). You could also add frozen peas here if, like me, you have a pea problem and find a way to include them in every meal. I also add a generous squeeze of lemon juice (or lime) to add a little acidity and freshen it up.
  4. Lastly, add some fresh, chopped coriander and then serve either by itself or with cooked rice. You could also add some plain yoghurt (a delicious creamy contrast to the earthy, spiced lentils), but I wanted to keep this dairy free.
  5. Eat the dahl way too quickly and then wish you could eat more, but you can’t because you’re supposed to be taking it for leftovers tomorrow.

untitled-20

Lentils are a pretty amazing part of a vegetarian/vegan diet, so if I could just for one second put on my lentil appreciation hat…they’re are an amazing protein source (without all the fat and cholesterol of meat), contain heaps of fibre and are full of nutrients. The best thing about lentils is that they are ridiculously filling, but also really low in calories. Dahl is one very easy way to incorporate them into the diet, and it’s the perfect thing to try during the colder months when a spicy, warming curry becomes as attractive as Ryan Gosling in a cardigan.

Dahl will always be one of my favourite meals. It costs next to nothing and yet tastes like heaven. Also, for something that tastes so complex, it only needs around about half an hour to prepare (just don’t forget to cook your rice because you were too busy being proud of yourself for making a home-cooked dinner instead of getting burger fuel). Let me know if you give it a try!

What’s your go-to winter meal? 

Our daily, lazy breakfast

Banana Mango Smoothie

I love food and spend most of my hours of the day looking forward to my next opportunity to eat. Some may consider that sad, I think of it as being gastronomically appreciative, every chance I get.

Banana Mango Smoothie

Breakfast is one of those meals I can pass on, me and toast have never been great friends and soggy cereal is basically one of my versions of hell on earth. In an effort to being better eating habits and stop eating my lunch at 11am, we bought a fancy blender and started experimenting.

This banana and mango smoothie is the most boring of them all, but I wanted to start with it as its our usual every-day choice. Delicious but no-fuss, packed with protein powder and banana to keep you full until its an appropriate time to eat lunch, its an easy winner.

We started off making this with plain yoghurt and trim milk, but have now tried to reduce our dairy and so have been substituting with almond milk instead (one day I’ll try making my own, until then laziness wins out and I have been trying different supermarket offerings). Taste-wise there isn’t much difference, apart from a slightly nutty flavour, which we both like. It does result in a slightly thinner smoothie that’s easier to drink (don’t worry, the banana still thickens it up).

myfoxycorner Every day smoothie

Ingredients (serves 2):

  • 2 ripe bananas
  • 1/2 can of tinned mango (or roughly 1 fresh mango)
  • 2 scoops of protein powder (ours is banana flavoured, but vanilla would work too)
  • 1 1/2 cups of Almond Milk (or substitute)
  • Large handful of ice cubes

Chop up the banana roughly. Chuck everything in the blender and whizz (very technical) till its smooth/at your desired consistency.

The mango and banana are a really nice pair of flavours, sweet enough without needing to add any honey and matched with the nutty almond milk. Cans of mango are super cheap and I love not having to rely on fresh fruit, so there’s always a couple of tins in my pantry (I know fresh fruit is way cooler, but it always just ends up going mouldy because I put off eating it until the last possible moment). We add in protein powder just to bulk up the other protein we get from our diet, and if you have any excellent recommendations for good protein powder options please let me know!

myfoxycorner smoothie
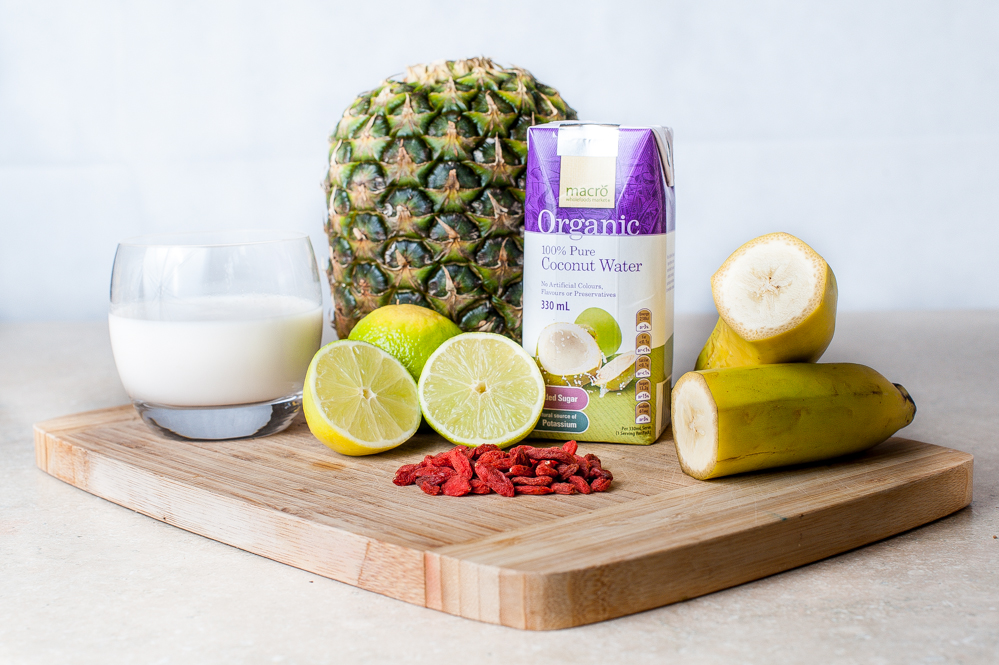
What about you, do you live for breakfast or struggle to remember it like me? What’s your favourite smoothie flavour combination?


Christmas Fruit and Nut Fudge

Christmas Fruit and Nut Fudge Recipe
This post was promised last week…so I’m hoping that Sunday still counts because as per usual life has gotten in the way and what should have been easy to do took me forever.

I love making handmade gifts but am not a crafter or a DIYer so in place of glitter, mason jars and twine I go with good old chocolate for making gifts for those people who can be a little awkward or tricky to buy for. This fudge I came up with last year and then made recently for our #brunchclub goodie bags, and it seemed to go down a treat!

Christmas Chocolate Fudge Recipe

It uses my pretty standard chocolate fudge recipe and throws in some extra bits and pieces to bring in the festivity. Along with the rich dark chocolate and sweet condensed milk I add some nuts (what ever is handy but my current favourite combo is almonds and pistachios) as well as some dried cranberries and some dried ginger/candied peel stuff that I found and that looked mildly appropriate. The result are rich little morsels of smooth chocolate, crunchy nuts and chewy fruit. The overall objective: Christmas in every mouthful.

Ingredients for Christmas Fudge

Ingredients for Christmas Fudge

  • 375grams of dark chocolate (or thereabouts, use milk if dark chocolate isn’t your thing, although I totally recommend the dark variety, as in my humble chocolate loving opinion, it goes perfectly with the sweetness of the fruit)
  • 1 can sweetened condensed milk (around about 250g)
  • 100g butter
  • 1 tsp vanilla essence
  • 1 cup slivered almonds that you have tried to hack into smaller pieces but in reality have just turned into a giant mess
  • 1 cup of crushed pistachios (not too crushed, just not whole? See above)
  • 1 cup dried cranberries (or some other form of delicious dried fruit pieces)
  • 1/2 cup of candied peel/ginger mix

Method for Christmas Fudge Recipe

  1. Put the butter, condensed milk, vanilla essence and chocolate all into a saucepan on a low heat. I put the chocolate in last and keep this pretty low in temperature as chocolate can be one fussy ingredient and the fear of it seizing on me makes me unusually cautious. Not cautious enough to use a double boiler, which you can totally do. Im cautious but also lazy I guess this indicates.
  2. Wait for this to all melt but stir it until your arm hates you. Or get someone who loves you to stir it. It needs pretty consistent stirring, again so that the chocolate doesn’t turn on you and ruin a perfectly delicious gift idea.
  3. Once everything is smooth and combined, take the mixture off the heat and throw in half of all your delicious extras (as in half a cup of each nut, 1/2 cup cranberries and 1/4 cup of the candied mix). Mix this all through then pour into a lined baking tray.
  4. Smooth the whole thing down with a spatula (not too smooth ’cause rustic is totally what we are going for) and then sprinkle the rest of your extras over the top, attempting to be even but in the end, this is an unrealistic expectation to set upon yourself so just go wild. Press this all down gently otherwise all this good stuff will go rampant when we cut it up and bag it.
  5. Set in the fridge for as long as you can, at least a few hours then take it out and slice it!Chocolate Fruit and Nut Christmas

Tips – If the mixture with the chocolate starts to get too thick or its not smooth enough add a little liquid. I use baileys (because I love to add this to everything) but you could just use a little cream.

Christmas Fruit and Nut Fudge RecipeToppings for Fruit and Nut Fudge

Being Lizzy, I forgot to take a shot of these all bagged up with Christmas ribbons, but a recipe post wouldn’t be complete without me forgetting a step. You can buy little resealable bags from places like Looksharp, which make life a lot easier. I then added some twine and ribbon to make them worthy of all the lovely bloggers but you could just eat it all with the purpose of saving all your friends and family the calories.

Christmas Fruit and Nut Fudge Recipe

The great thing about this fudge is that you can totally change it up as much as you want. You can go with white chocolate, macadamias and cranberries (this actually sounds like a good idea for my next fudge post…), chocolate and coffee liqueur with hazelnuts, peppermint chocolate (just add a small amount of peppermint essence and voila!). The opportunities are almost endless! Let me know if you end up making this or if you have any other amazing fudge recipes to share!Christmas Fruit and Nut Fudge RecipeChristmas Fruit and Nut Fudge Recipe

signature

Marshmallow Chocolate Mud Cookies

So today I found out I would never be able to have a cookbook because I just can’t name recipes. I can’t. I don’t know how people come up with creative yet still descriptive titles. Mine are all either too abstract that they could be anything or just downright boring. For the sake of clarity I stuck with the boring because these cookies are so delicious that they don’t need much creativity to sell. DSC_2325

I am not a cookie person, but if I am going to eat cookies I prefer them homemade (who doesn’t) and these cookies are the only recipe I come back to over and over again when I want something delicious to tackle my ever-present craving for chocolate but not waste a whole day in the process. I almost always make these with my two little brothers which demonstrates how easy and fun they are to make (and even more fun to eat).

Team work

Team work

Let me give you a quick sales pitch (although you could just glance at the photos and I am quite confident you will be sold). These cookies hit all the right spots for me, chewy and moist on the inside, crispy on the outside, rich chocolate taste as well as extra little bites of chocolate pieces and topped with some gooey caramelised marshmallows…because if you are going to indulge you may as well have it all (I haven’t mastered moderation at this point in life).

ingredients

  • 1 – 1 and a half cups of chocolate chips (I love a mixture of dark chocolate and white chocolate but hey, go crazy)
  • 1/2 cup more of chocolate set aside (this can be in any form as you’re going to melt it anyway/eat it)
  • 1/2 cup of softened butter
  • 1 cup white sugar
  • 2 large eggs
  • 2 tsp of vanilla (I really love vanilla essence so just add 1 tsp if you aren’t such a big fan)
  • 1 1/2 cups plain flour
  • 1 tsp baking powder
  • 1/2 tsp salt
  • 1 bag of mini marshmallows (don’t worry, there will be plenty for snacking on)

method.

  1. Microwave your half cup of chocolate in a small microwave safe bowl until smooth. I check the chocolate every 30seconds and give it a good stir before continuing because too many times have I been fooled when microwaving chocolate and there is nothing more disappointing than ruining perfectly good chocolate. Whilst microwaving set your oven to bake at 180 degrees celsius.
  2. Sift the flour, baking powder and salt into a separate bowl and ignore all the dishes that will need to be done after this is over.
  3. Cream the butter and sugar until creamy and fluffy. Make this easier on yourself with a electric mixer unless you enjoy the challenge of doing this by hand. Once this is creamy add the eggs one at a time, beating after each egg is added. Lastly beat in the vanilla and the melted chocolate.
  4. Gradually add the flour mixture into the chocolate, folding in gently but thoroughly so the air doesn’t escape. Add in the chocolate pieces (after taste testing a few to make sure they are worthy of your mixture).
  5. This is where it gets messy. Roughly roll teaspoonful balls of dough onto paper lined trays (chocolate is going to get all over your hands, but don’t worry the mixture tastes almost as good at this point as it does in approx 15 minutes). DSC_2267
  6. You can add your marshmallows now or in around 5 minutes depending on how well done you want the marshmallows to be. I add mine after a little bit of cooking just so that they don’t get too brown. Put roughly 3 mini marshmallows on top of each cookie or 4 if there is space and you haven’t already eaten too many.
  7. Bake at 180 degrees celsius for around 15 minutes or until they look evenly cooked/set. They will be pretty soft so once out of the oven leave to cool before transferring to a wire rack. Enjoy your hard work with a well earned cookie and glass of cold milk.

1


Let me know if you give these a go (preferably in advance so I can come over and eat some) and if you have any amazing cookie recipes please throw them my way so I can expand my very narrow cookie repertoire. Link me up in the comments or on Twitter or Facebook :)


DSC_2309

Flick doesn’t understand why we bake things which she cannot eat and is thoroughly disappointed because these smelt so good.

DSC_2320DSC_2334


Moist Chocolate Cupcakes (that time I fell in love with a recipe)

You know when you meet someone again after a really long time, and you should remember their name but you don’t. You feel uncomfortably awkward because they act like they know you (and they seem to have remembered everything about you including your hatred of asparagus and your second-cousin’s ex-wife’s love of water-polo) and yet you remember nothing and have no idea how to interact with them.

Ok so maybe I am the only one.

Well thats what I feel like now. Coming back after a several month long hiatus of blogging where I was in a bit of a transitional period of life, busy with work, family and friends (but not busy enough that I can really use that as an excuse for abandoning myfoxycorner as well as myfoxytravels; two blogs=twice the guilt).

I am trying to pretend like I remember how to do this, when in reality I don’t think I ever really got the hang of blogging in the first place. So instead of just awkwardly dancing around the fact that I have been missing for a while, I will just be upfront with how hard it is to try and re-introduce myself to this little corner of the world.

Image-1 (1)

I could give you a rundown of all the exciting for me, mundane for you, updates in my life. Or I could fall back on an easy yet delicious cupcake recipe and save all that for when I can be bothered.

This cupcake recipe is one I have wanted to blog about for ages and for some reason never have. The reason why eludes me; these cupcakes are my soul-recipe. They are fool-proof (or rather Lizzy-proof). The evidence in this lies in many failed attempts at following a half remembered recipes, forgetting to set timers and then forgetting about the oven contents, and a couple of accidental grillings (how hard is it to make sure you set the oven to bake?, you ask).

Throughout all of these mistakes, these cupcakes have been like my parents. Supportive, forgiving, persistent, reliable and (end of parent comparison) just down right delicious. They are speedy and don’t use anything fancy that isn’t normally lying around my well-stocked cupboard (when it is well-stocked and not just full of pasta and chickpeas). They are the recipe I fall back on for anything and everything, including the ever common scenario I find myself in where I have to (want to) make something delicious and impressive for the next day but it’s already 9pm at night.

These chocolate cupcakes have everything I could want in a chocolate cupcakes. They are moist but still fluffy, rich but I can still eat several at a time, chocolatey but not overly sweet. Satisfying and reliable, like an old episode of the Simpsons.

So without further ado, here it is, the 1 recipe I would take with me to a desert island (or a more appropriate dessert island).

The easiest but most delicious chocolate cupcakes (adapted from hersheys.com “Perfectly Chocolate” Chocolate Cake):

photo 1

  • 2 cups of Sugar (I like using mostly white with a little bit of brown sugar thrown in for some giggles)
  • 1 3/4 cup standard flour
  • 3/4 cups cocoa powder
  • 1 1/2 tsp baking soda
  • 1 1/2 tsp baking powder
  • 1/2 tsp salt
  • 2 eggs
  • 1 cup milk
  • 1/2 cup vegetable oil
  • 2 tsp vanilla extract
  • 1 cup boiling water (I add a tsp of instant coffee but this is optional)

  1. Preheat oven to 180 degrees Celsius and prep your muffin tins with some appropriately beautiful cupcake liners
  2. Add all of the ingredients to a mixing bowl except the boiling water (and coffee). Sift in some stuff if you want but there is no need to get flour all over the sifter and then hate yourself afterwards.
  3. Beat by hand until the batter is completely combined, smooth and lump free.
  4. Add the coffee to the boiling water and then the coffee/boiling water to the mixing bowl. Whisk until this is just blended in. I’ll be honest here and warn you that its going to look like a chocolate soup (which does not look as delicious as it sounds). This is normal and great so just carry on, you’re doing an awesome job.
  5. Evenly pour the mixture into your liners, 3/4 full maximum to avoid spillage and angry regretful tears. Bake for around 20 minutes but around 15 minutes I start testing with a skewer. Once it comes out clean, take them out.
  6. Try to not eat them long enough for them to cool and then ice with what ever takes your fancy. My favourite icing for these at the moment is a baileys and cream cheese concoction, but a simple vanilla buttercream is also a perfect accompaniment. As is peanut butter. Or a dash of icing sugar, so that time that could be used for eating isn’t wasted on icing.

So there they are, deliciously simple and forgiving, these cupcakes are always a star at the workplace as well as with friends, family and even enemies. These were the first cupcakes I ever made and were so easy that I thought I must be amazing at all cupcakes. This misconception was cleared up when I tried to follow a different cupcake recipe (poorly) and realized I was not the natural cupcake superstar I had envisaged. But damn, these chocolate cupcakes do a good job of helping me pretend I am.

photo 2 (1)

With Baileys and Cream cheese icing (plus some Malteasers). I think this is when I realized I had fallen in love with a cupcake.

Give them a go and let me know how much you love them. Just remember to turn the oven to bake (or don’t, they will still taste amazing).  And hey, I’m very happy to be back. Sorry I can’t remember your name.

signature

Not Your Average Brownie (Gluten-Free)

Hey Guys!

So just a quick post today featuring one of my favourite gluten-free recipes ever. I am a big fan of brownies and my ultra-rich recipe is one I turn to a lot but when I was doing my gluten free trial I tested out this recipe and found it to be equally as delicious and just as easy to make. Compared to the my usual brownies these aren’t quite so rich but still chocolatey with less cocoa, more chocolate and the addition of cranberries and caramel drops (which add a little bit of a black-forest spin to a simple brownie recipe). This recipe makes about 18 little muffins (which I think are kind of adorable) or you can make about 18 slices using a tin.

The recipe is taken mostly from a Julian Lelerc recipe for GF brownies (which I cannot find online and which I have a cut out article of which gets increasingly dirty and damaged each time I make these)  and really is incredibly easy whilst being wonderfully tasty and full of chocolate goodness.

DSC_3919

Ingredients:

  • 200g Butter cubed
  • 200g Dark cooking chocolate, chopped roughly
  • 1 1/2 Cups Brown Sugar
  • 4 Eggs, lightly beaten
  • I C Gluten-free flour (available at Supermarkets)
  • 2Tbsp Cocoa powder
  • Roughly 1/2 Cup of craisins and 1/2 Cup of Nestle Caramel Drops (but you could add/substitute with mini marshmallows, almonds, chocolate drops, or anything else that takes your fancy

Method

  1. Preheat oven to 180.C and either line your muffin tin or baking tin with muffin cases/baking paper.
  2. Place butter and chocolate into a heatproof bowl over a saucepan of simmering water. Or if you are lazy like me just pop it directly in the saucepan over a very low heat/microwave with 30 second bursts with heaps of stirring in between. Melt until everything is smooth and combined (i.e. the chocolate is melted..)
  3. Sift in the flour and cocoa and stir into the chocolate mixture,
  4. Add in the extra ingredients and stir to combine.
  5. Pour into your chosen baking receptacle and bake for around 10-15 mins in the muffin tin (test after ten mins quite often with a skewer, or in my case a piece of spaghetti past (uncooked!) to test. These will be best if the skewer/pasta comes out almost clean, moist but not completely dry). If using a rectangle brownie tin bake for approx 45-50mins. Remove to cool then enjoy! Or if you can resist long enough sprinkle with icing sugar cause it looks pretty

DSC_3926

These are delicious and moist, rich but also complex with the taste of tart craisins/cranberries and delicious morsels of caramel. These also last really well if you store them in a airtight container. I am sure you could substiture the GF flour for normal flour but I have no idea if it turns out the same. I think the dense nature of GF baking really works for this recipe and creates the perfect little lunchbox treat for work, firm on the outside but deliciously chocolatey on the inside. Definitely give it a try, they are basically fool proof. The only real warning I have is to make sure you  don’t overcook them. These are 100x nicer when they are still a little under on the inside. This is harder to acheive in muffin form but with a little careful testing can still be done.

Give them a try and let me know what you think! Also if you have any other great ideas for additions please share below. I will making this many more times in the near future…

Lizzy Xx

DSC_3920psst! Go like my Facebook page and get new posts delivered right to your timeline :)

Chocolate and Red Wine Cake aka Comfort Cake

So on this slightly cold Tuesday I have been moping at home sick (but mostly just exhausted) and not able to drag myself into work. I hope that the massive sleep in this morning helps and keeps me going for the rest of the week! Yesterday also started my gluten free trial period (of two weeks approx) to see how my body feels and if changing up my diet helps things like my skin or overall well being. After this first week I shall bring you an update on how all that is going as well as a  gluten free recipe that makes this whole exercise worth it.

Today I bring you a recipe that is not gluten free but is one that I made a couple of weeks ago for my Dad’s birthday. The recipe comes from a favourite blog of mine, hungry and frozen, and I won’t bother rewriting it here as Laura does it best her self! Instead I will just give you a little food porn and explain how much I enjoyed making this. And here is the reliable yet delicious recipe!

DSC_3652


Let me begin by explaining a small fear (okay more like a slight phobia) I have of making cakes. I love cupcakes and make them all the time but cakes baffle me and usually just go terribly wrong. I think this might be the third ever cake I have made. Why do they frighten me in a slightly irrational way I hear you asking? Well mainly just because I can’t taste test the cake to make sure it tastes good and is cooked right.  With cupcakes I would always eat one (or two) before sharing to make sure I am not making a huge mistake and with a cake this is a bit harder. Undercooked, overcooked, too much baking soda, who knows until the big moment where everyone gets a slice. So yeah, making a cake is a big deal for me.

photo (1)

I went to Laura’s book launch up here in Auckland (which was too much lovely to even begin to describe) and bought her cookbook and then spent the night reading each and every recipe before I could go to bed. The cookbook is great and full of a variety of unique and creative recipes (there is a whole section on toasted sandwiches..this is when I knew I had made the right choice). My first chance to use it was for my Dad’s birthday dinner when I was trying to find a desert for someone who doesn’t have much of a sweet tooth. I ended up going with this because he likes wine and I like chocolate. It just made sense.

DSC_3611

The recipe was simple and easy to follow, the ingredients all pretty standard and nothing to crazy. The addition of cinnamon and red wine to this slightly dense but not overly rich chocolate cake brought a warmth and complexity which was very enjoyable and makes it even more comforting than a standard chocolate cake would be. I think my oven was running a little too hot, as you can see from the photos the cake got  a little carried away in the cracking department, and next time I would take it out a smidgen earlier to maintain optimum moistness (ugh). I served this up with oranges and lots of whipped cream and was really rather spectacular.  I am now thinking about which cake recipe I can try next…. Definitely give this cake a go if you like chocolate and red wine, it was pretty fool proof (if I can make it anyone can) and with a large smothering of chocolate ganache it ends up looking pretty impressive too.

DSC_3634

Ready for a little bit of a photo overload?

DSC_3613

Chocolate ganache. So easy to make and equally easy to just eat straight out of the bowl. Try save some for the cake

DSC_3597DSC_3620DSC_3598DSC_3644DSC_3641DSC_3649

Sorry for all the photos! I couldn’t resist putting heaps of them in (and this is a rather small selection, trust me!). Also thanks to Edd for being my photographer :) He does such an awesome job!

Have a great week!

Lizzy xx

Some Foxy Brownies

Hi All!

So this week is proving to provide little time or inspiration for blogging. I would love to do some more wedding posts but don’t have the time or energy to plan and write them out. Small update! Invites have been sent off from the designer today so hopefully I get them soon to send off to the invitees! Can’t wait to show you all what they look like! I was so pleased with what the results were (although I haven’t seen their completed state just yet). Anyway, as I have had this recipe waiting to be blogged for ages I thought I would throw it up in my spare ten minutes :) Oh and nothing makes these brownies particularly foxy… I just couldn’t think of a name other than “Brownies” 😛

(more…)

1 2